Getting Started
Installation
kmeanstf is available from pypi and can thus be installed using pip:
$ pip install kmeanstf
TensorFlow is required (1.15.0 or 2.0.0+) and will be installed automatically if not present.
If you have a supported GPU it is advisable to install tensorflow-gpu to
get a speed-up of 4-8 for larger problems (see https://www.tensorflow.org/install/gpu).
Self Test
kmeanstf has a simple self-testing/demo routine which is realized as static member self_test().
Per default it generates a random data set from a mixture of Gaussians and runs both k-means++ (from scikit-learn)
and tunnel k-means. The summed squared error (SSE) and the runtime is printed out and the results are
plotted via matplotlib.
If you execute the following code (with python 3)
from kmeanstf import KMeansTF
km = KMeansTF.self_test()
a table and a plot are generated:
self test ...
Data is mixture of 50 Gaussians in unit square with sigma=0.00711
algorithm      | data.shape  |   k  | init      | n_init  |     SSE   | Runtime  | Improvement
---------------|-------------|------|-----------|---------|-----------|----------|------------
k-means++      | (10000, 2)  |  100 | k-means++ |      10 |   0.66363 |    2.23s | 0.00%
tunnel k-means | (10000, 2)  |  100 | random    |       1 |   0.64342 |    2.81s | 3.05%
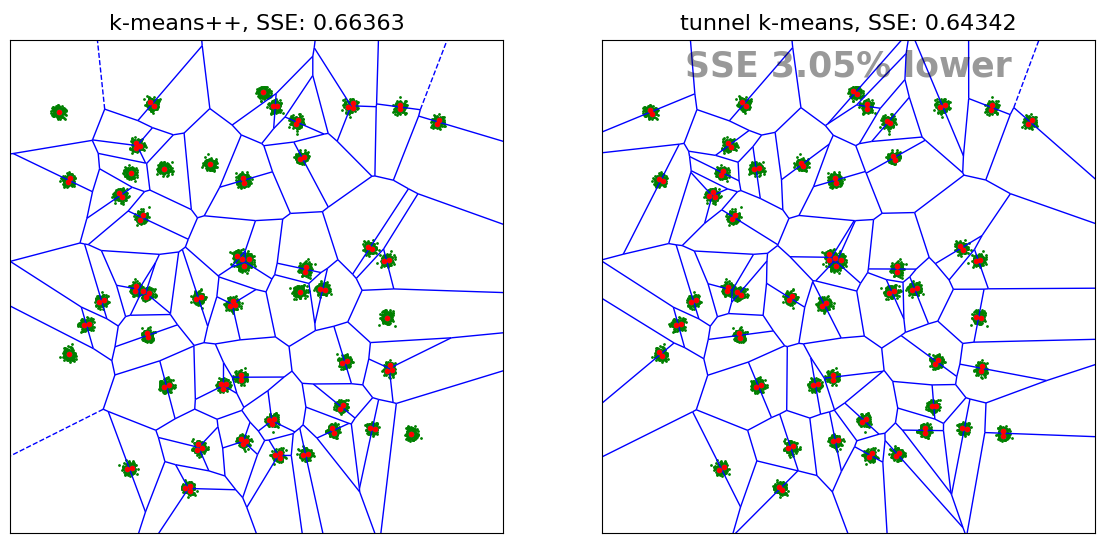
Since in this problem the number of centroids (100) is twice as high as the number of Gaussian clusters (50), it seems reasonable to position two centroids in each Gaussian cluster. One can note that k-means++ leaves a number of clusters with only one centroid which leads to a higher SSE than tunnel k-means.
The self_test() method can also be parametrized to have a different mixture of Gaussians (e.g. only 20 Gaussians)
or a different value of n_clusters (a.k.a. k). Also an own data set can be provided in parameter X (see documentation).
Using KMeansTF
The class KMeansTF is a very close equivalent of scikit-learn’s KMeans class.
Executing the following code
import numpy as np
import matplotlib.pyplot as plt
from kmeanstf import KMeansTF
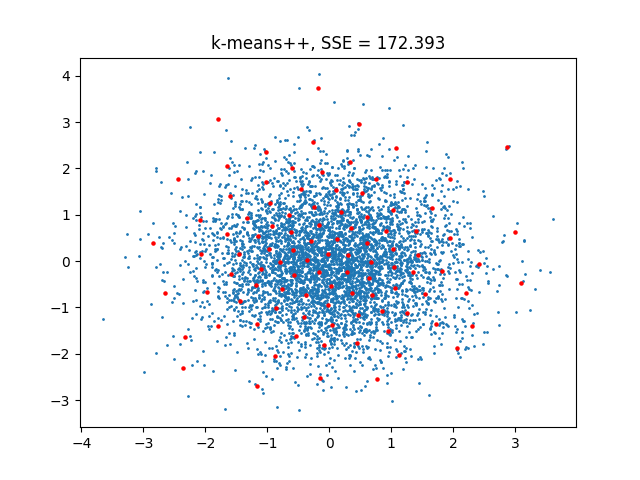
km = KMeansTF(n_clusters=100, random_state=1)
X = np.random.normal(size=(5000,2))
km.fit(X)
plt.scatter(X[:,0],X[:,1],s=1)
plt.scatter(km.cluster_centers_[:,0],km.cluster_centers_[:,1],s=5,c="r")
plt.title(f"k-means++, SSE = {km.inertia_:.3f}")
plt.show()
Note
The parameter random_state was set to 1 here to seed the random number generators of python, numpy and tensorflow.
Thus the generated data set is identical to the following example and the SSE values can be compared.
leads to:
Using TunnelKMeansTF
The class TunnelKMeansTF implements the tunnel k-means algorithm as described
in `arXiv:TODO <>`_. Its API is very close to scikit-learn’s KMeans class
but has some additional optional parameters related to tunnel k-means.
Executing the code
import numpy as np
import matplotlib.pyplot as plt
from kmeanstf import TunnelKMeansTF

km = TunnelKMeansTF(n_clusters=100, random_state=1)
X = np.random.normal(size=(5000,2))
km.fit(X)

plt.scatter(X[:,0],X[:,1],s=1)
plt.scatter(km.cluster_centers_[:,0],km.cluster_centers_[:,1],s=5,c="r")
plt.title(f"Tunnel k-means, SSE = {km.inertia_:.3f}")
plt.show()
leads to:

The data set used is the same as in Using KMeansTF for k-means++. One can note that the SSE of the tunnel k-means solution is lower.